# Using Form Integrations Premium
In this guide, we will show you how to connect the forms in your pages with different integrations to automate and improve your workflow.
With these integrations, you will be able to bypass useless entries (like bots), be immediately notified of new data, and connect other software of your choice like a CRM or an Email Marketing tool.
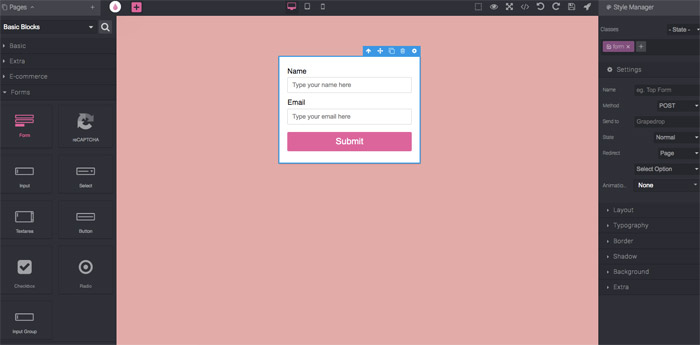
Before starting the Form Integration, you need to drop a form in the editor. You can follow along in this guide, where we do just that by creating a new page containing a simple form.
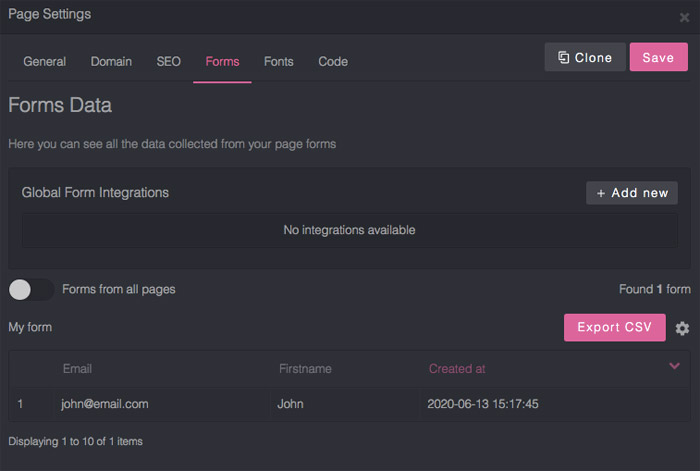
After you drop the form, all the data is collected in your Page Setting > Forms panel. But before being able to see your form data there, you have to submit at least one record (you can do it from the Preview page). Once data is collected, the form will be visible, and you can use integrations alongside it.
It is worth noting that Grapedrop utilizes a concept of Global and Local integrations.
- Global integration executes the integration every time someone clicks the submit button, on any form, regardless of which page it is on.
- Local integration executes the integration every time the submit button is clicked, but only on the specific form you are pointing to.
The Global container is already visible at the top of the panel. To open the Local container, you have to click the Gear icon on top of the form table.

Now, it is time to move onto actual integrations.
The first integration we will dive into is the Google reCAPTCHA , which is useful as a protection from spambots.
# Google reCAPTCHA Integration
WARNING
To use reCAPTCHA, you have to create the API keys from Google’s reCAPTCHA page (reCAPTCHA v2 checkbox or invisible, depending on what you use in your forms).
The reCAPTCHA is only available as a Global integration; so, from the Global Form Integrations section, click Add New and select Google reCAPTCHA from the dropdown.
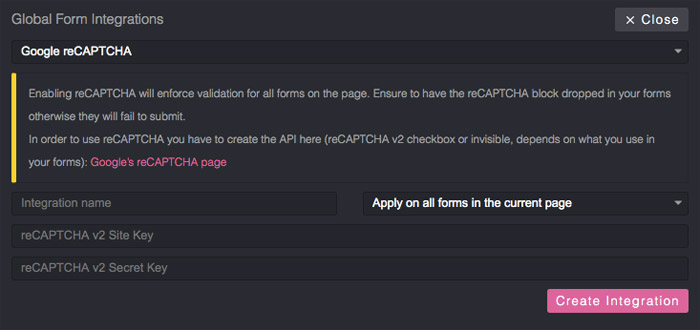
Here, you have to paste the site and secret key obtained from the Google page. Then you can save it by clicking Create Integration.
Next, if you try to submit a new entry from the form, in the Preview page, you will see that it fails: this is because you have to append the reCAPTCHA block in your form to enable reCAPTCHA validation
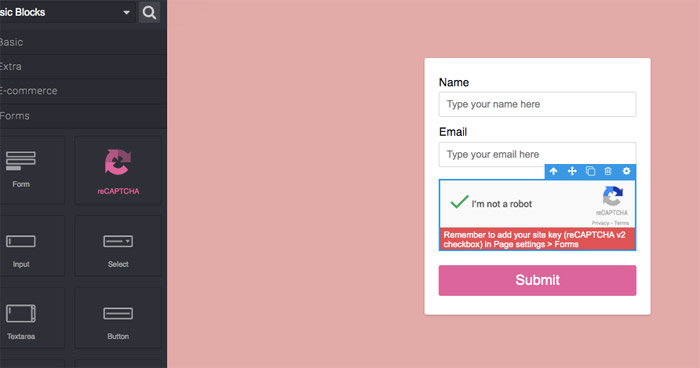
Now that the form is containing the reCAPTCHA block, it can submit the data correctly.
WARNING
We highly recommend testing all your forms on the Preview page before publishing publically.
# Send notifications via Email
When someone submits your form, you may want to be notified via email, whether to provide an automated response or to stay up to date with your forms. The email integration option allows you to do that.
To do this, start by creating an email to send to the user who submitted the form. In this case, the integration will be Local, so click the Gear icon of the form, select Integrations, and add a new Email integration. You will see all the options available to customize the email. In the subject and content, you can also use field variables. For simplicity, the default content lists all of them for you.
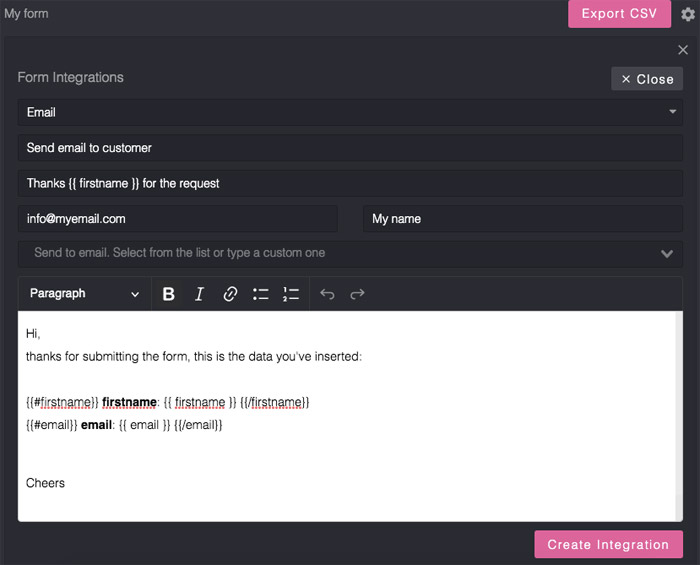
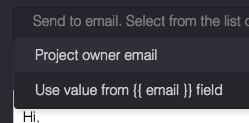
For the Send to email field, you can add different recipient emails and also choose from the list that was compiled in the form.
Once complete, you can save the integration.
Additionally, you can add another Email integration, a Global one this time, to catch all the possible submissions from your project, which will also work if you add another form on the page later.
So, from the Global Form Integrations container, add a new Email and customize it.
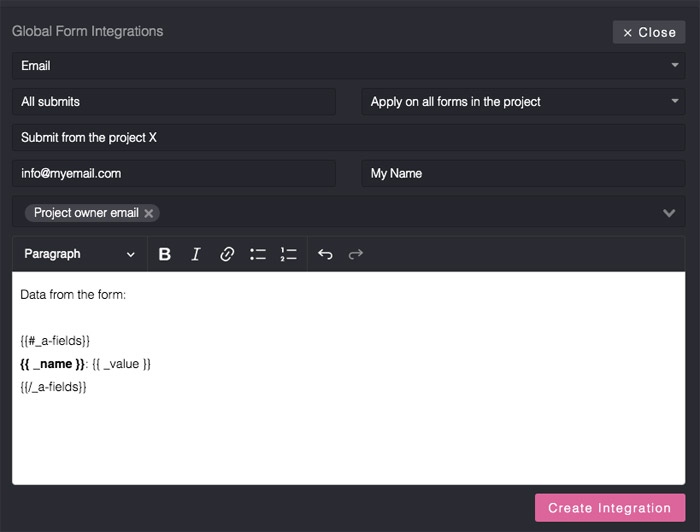
As you see, we selected the option Apply on all forms in the project to catch all the possible submissions from the pages of our project. For the Send to email field, we used the Project owner email option, and, inside the content, a special _a-fields variable prints all the possible form fields (Global integrations cannot know in advance from which form the request is sent).
# Send data to third-party applications via Webhooks
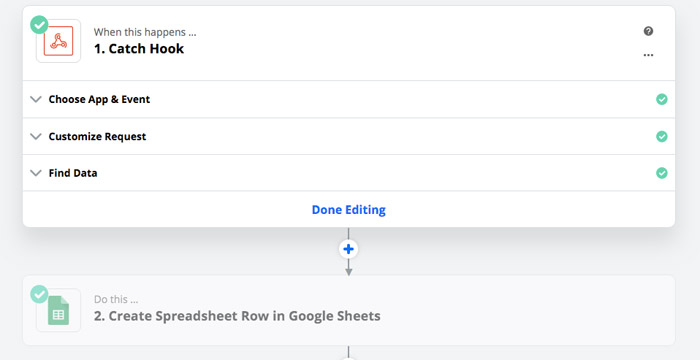
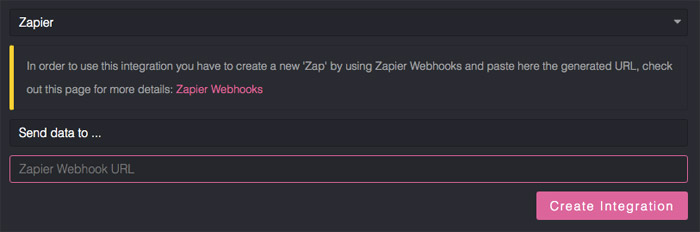
In addition to collecting data, Grapedrop can also propagate them to multiple third-party applications by using Webhooks, so you can automatically insert the new entry in your Google Sheets, Email Marketing tool, or any CRM. The fastest way to do that is by using workflow automation tools like Zapier or IFTTT, which offer connections to other applications. By default, Grapedrop offers support for Zapier Webhooks and standard Webhook (for any other external tool).
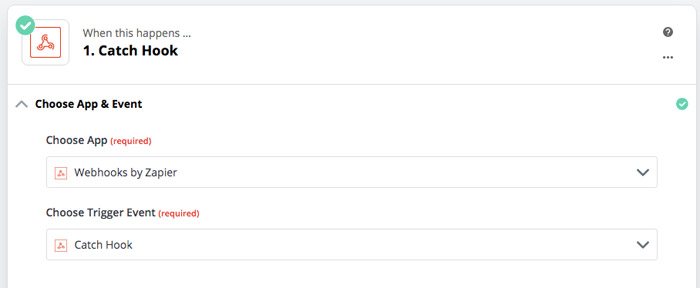
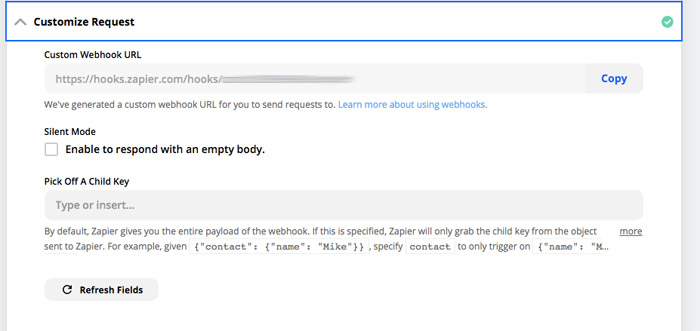
Creating your automated task with tools like Zapier is simple. All you have to do is to create a new task from Zapier by using Zapier Webhooks. Then copy the generated Webhook URL and paste it in your Grapedrop integration.
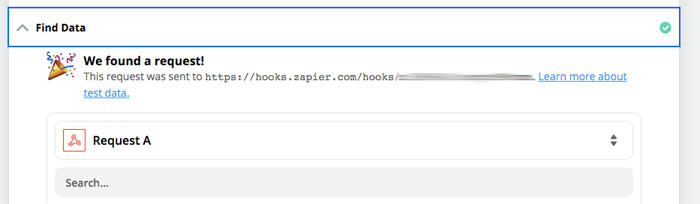
Save the integration and test your form on the Preview page, by submitting it.
That's it! Now you can connect any other application from the Zapier library.